In this blog we will explain how to auto-deploy builds from iOS to the App Store using Bitrise. First we will look at how to get the API key from the Apple App Store and how to connect the API key to Bitrise. Then we will take a look at how to connect your Apple Service to your apps team in Bitrise. In the last step we will add auto provision to your workflow in Bitrise.
Introduction
In order to set up auto deployment in Bitrise all builds must be signed properly with a correct provisioning profile. In this guide we will explain the steps needed to connect Bitrise to your App Store Connect account so each build will be uploaded automatically. This way no profiles need to be generated manually and uploaded manually. The first two steps of this guide are done in App Store Connect and require the roles Account Holder and Admin. In case you don’t have one of these roles these steps must be performed by someone else. You can send them this guide and ask them to perform steps 1 and 2. At the end of step 2 some information needs to be collected. These steps clearly describe what is needed to setup the configuration in Bitrise later on. For this you need:
- API key file (this is a .p8 file)
- Issuer ID
- Key ID
If someone else performs steps 1 and 2 make sure they provide you with those three things.
1. Request access to App Store Connect API
First of all we must request access to the App Store Connect API. This can be done by a user with the Account Holder role.If you have this role you can request access by following these steps:
- Go to https://appstoreconnect.apple.com and sign in.
- Select Users and Access.
- Next to the title select the Keys tab.
- Tap the Request Access button.

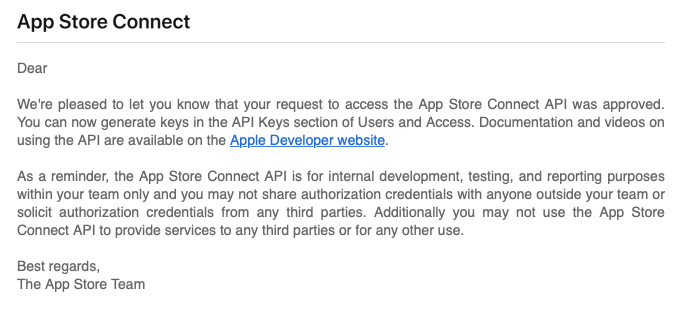
- You will receive an email when the request was approved. You cannot continue until this is approved. The mail will look something like this:
2. Generate API Key in App Store Connect
Once App Store Connect API access is requested we must generate an API key. This can only be done by a user with the Admin role.
If you have this role you can request access by following these steps:
- Go to https://appstoreconnect.apple.com and sign in.
- Select Users and Access.
- Next to the title select the Keys tab.
- Tap the Generate API Key button.

- Give the key the name Bitrise and under Access select Admin then tap Generate.
- After the API key has been generated select Download API Key and save the .p8 file somewhere you won’t lose it. You will need this file in Bitrise later on.

- Above the generated key you will see Issuer ID. You can select the Copy button next to it to copy the value. This value must be entered in Bitrise later on.
- Next to the Key ID you can select the Copy Key ID button to copy the value. This value must be entered in Bitrise later on as well.
3. Connect Apple Service account in Bitrise
Once the key is generated and downloaded, we can use it in Bitrise to connect our Apple Account to our Bitrise account.Perform the following steps:
- Go to Bitrise - Mobile Continuous Integration and Delivery and sign in.
- Select View Dashboard.
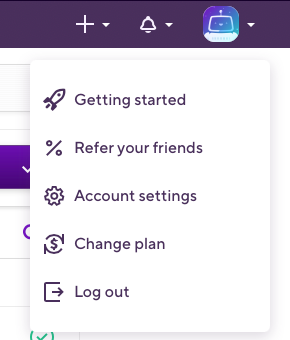
- Select your profile in the top right corner to show the dropdown and select Account Settings.
- Select Apple Service Connection in the menu on the left hand side (under CONNECTED ACCOUNTS).

- Select the Add connection button.
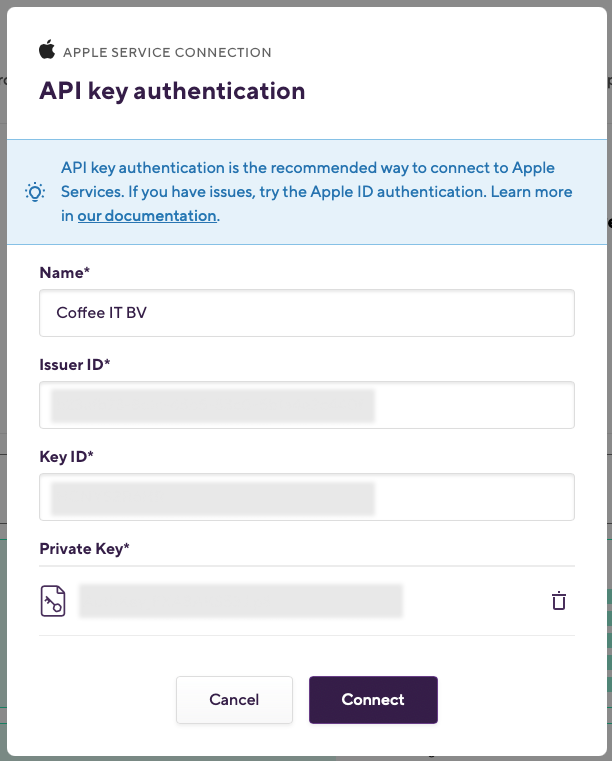
- In the pop up enter a name (recommend using your apple developer organisation name here).
- Under Issuer ID paste the issuer id you copied from App Store Connect.
- Under Key ID paste the key id you copied from App Store Connect.
- Finally select the Upload a Private Key (.p8) button and find the file you downloaded earlier.
- After everything is setup select the Connect button to save your connection.
4. Add Apple Service connection to your app's team in Bitrise
Once the Apple Service Connection is made it still needs to be added to the team of your app. This must be for every app:
- Open the app you wish to add the connection to (either via dashboard or via the Search for app… search bar in the top left corner).
- Once you have your app open select the Team tab.

- Scroll all the way down to Apple Service connection and select Connection not set underneath API key authentication (recommended). This will show a dropdown with all you connections.
- Select the connection you made in the previous step.
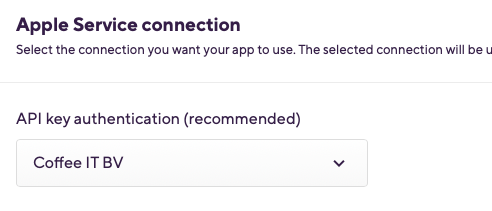
- That’s it! Changes have been saved automatically.
5. Add iOS Auto Provision to your workflow in Bitrise
Once we have a Apple Service connection setup and connected to our team we can use it to auto provision our apps during our workflow:
- Open the correct app.
- Select the Workflow tab to open the workflow editor.

- In the editor select the + button somewhere in you flow to add a new step. Make sure to add this above any step that builds your app (for example above the Export Archive & Export for iOS).

- The steps selector will be opened. Type iOS Auto Provision in the search bar to filter the results ands select iOS Auto Provision with App Store Connect API (do not select the option with Apple ID).
- In the step editor for the step, you just created, we only need to change one thing. Scroll down until you see Distribution type (Required). In the text field it probably says development. We need to change this. Select the button Insert variable on the right hand side of this section.

- In the popup that is opened select $BITRISE_EXPORT_METHOD. You can filter the results by typing in the search bar. Selecting this makes sure the export method is always used from the environment variables and you can change it without changing your workflow itself.
- Remove any other profiling step from your workflow. You probably have a step called Certificate and profile installer. Select this step to open the editor and select the Trash can icon to delete it.

- Last but not least, make sure to save your changes. Do this by selecting the button in the top right corner or using the keyboard shortcut CMD + S (on mac).


.png)


